See Updates Below…
Great video showing lots of tips.
Updates
UPDATE #1
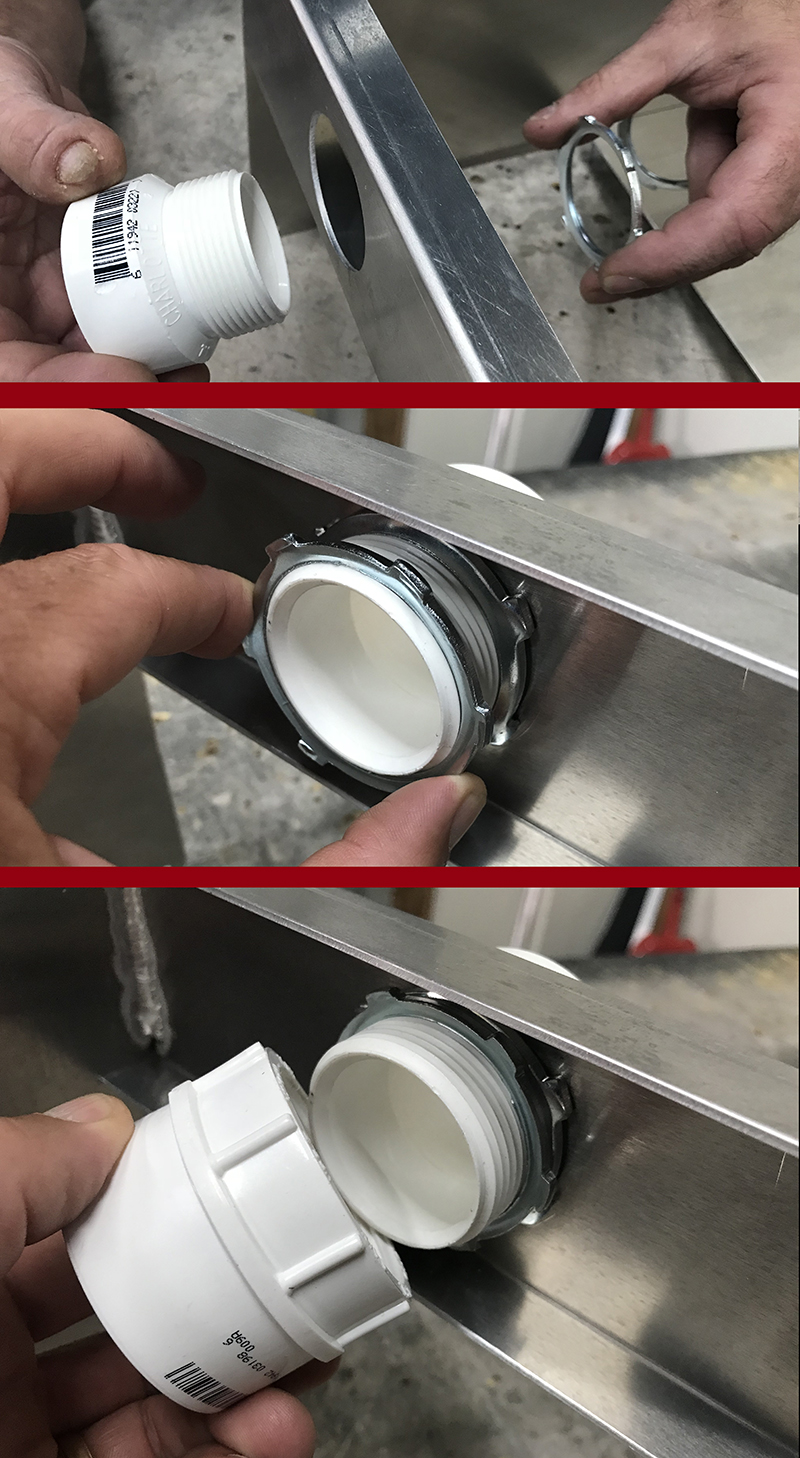
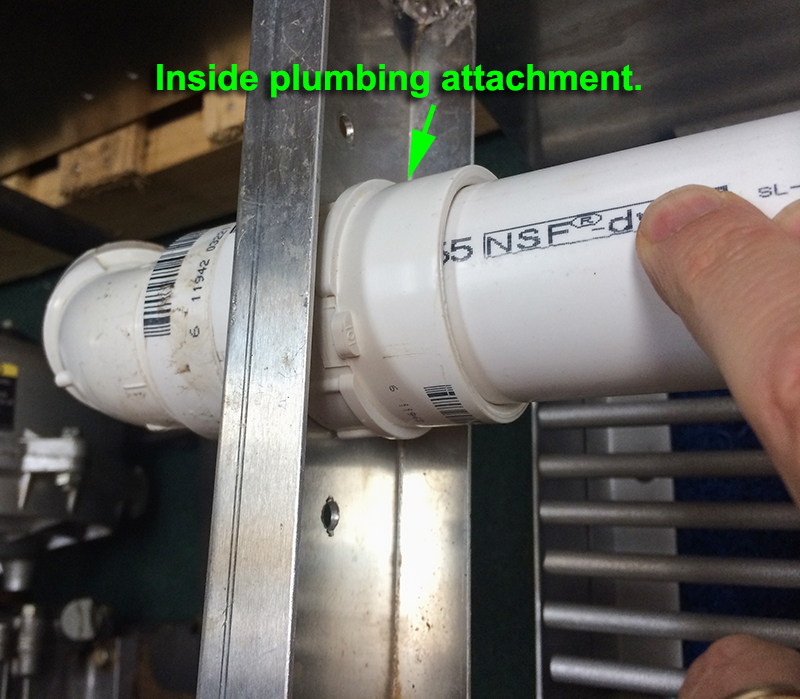
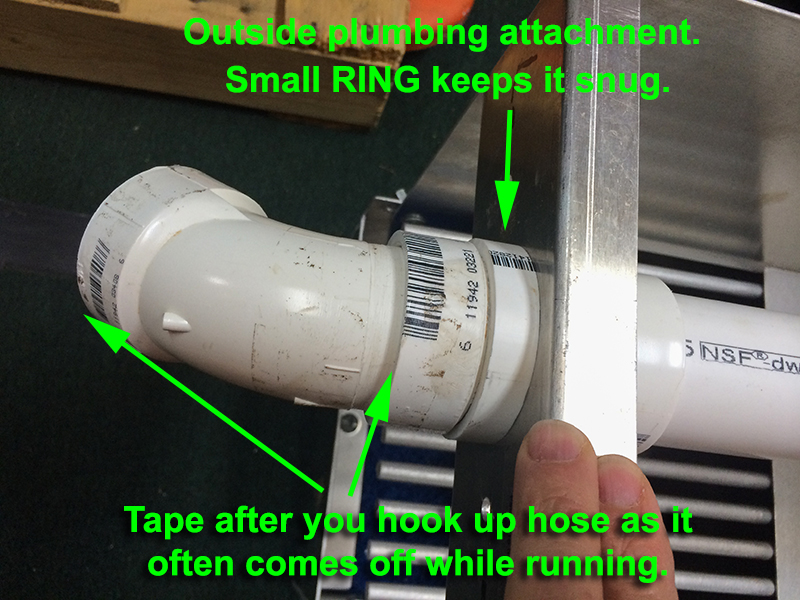
We no longer use a plastic spacer on the plumbing. Instead you will find two METAL threaded lock washers that can be installed as shown below.
UPDATE #2
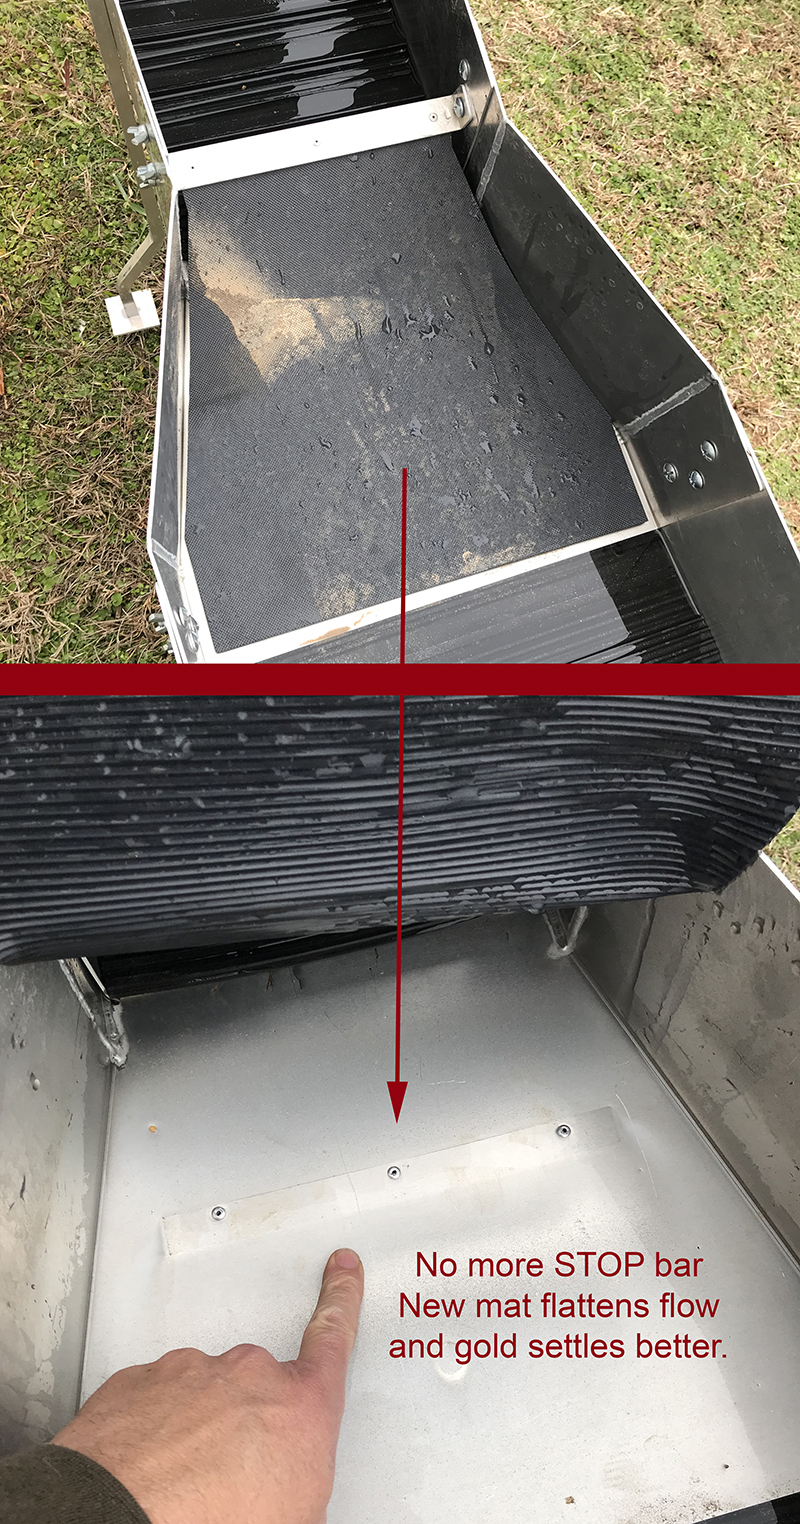
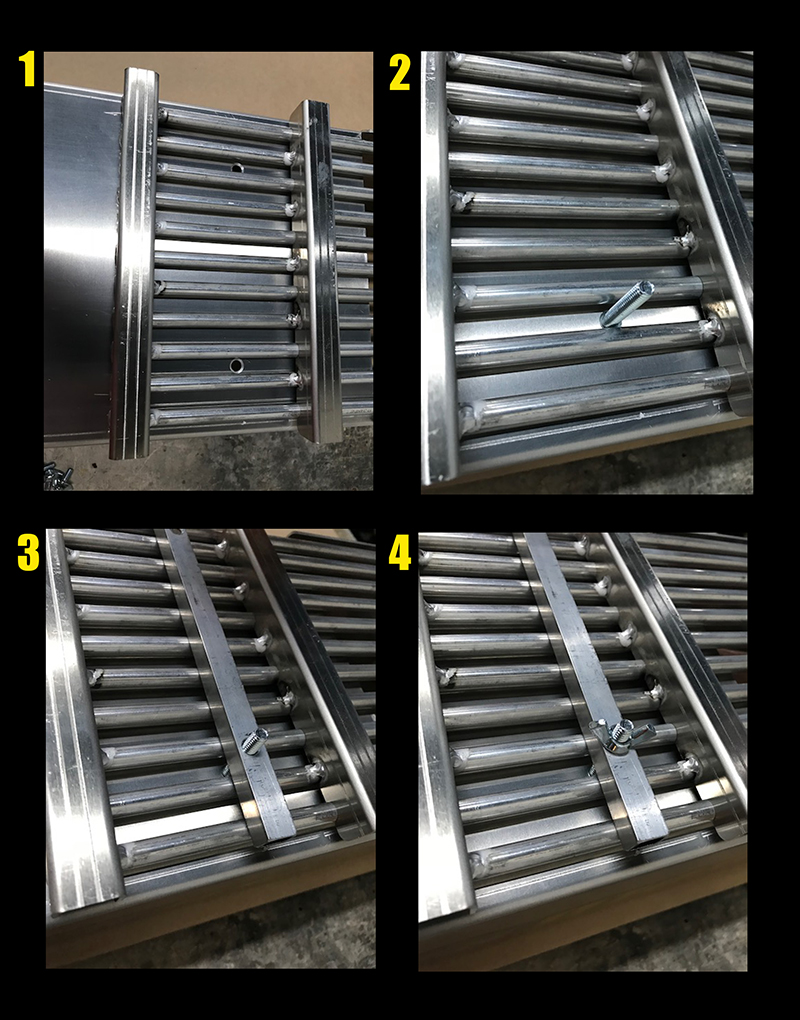
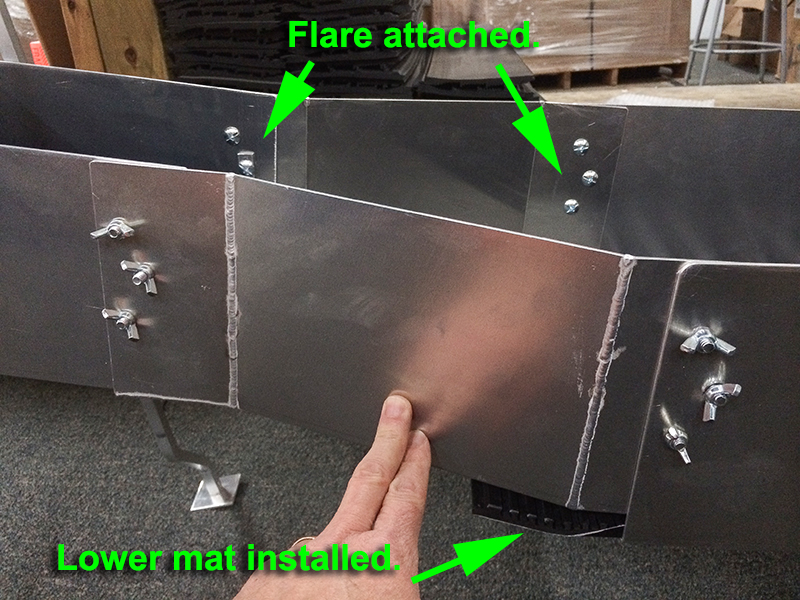
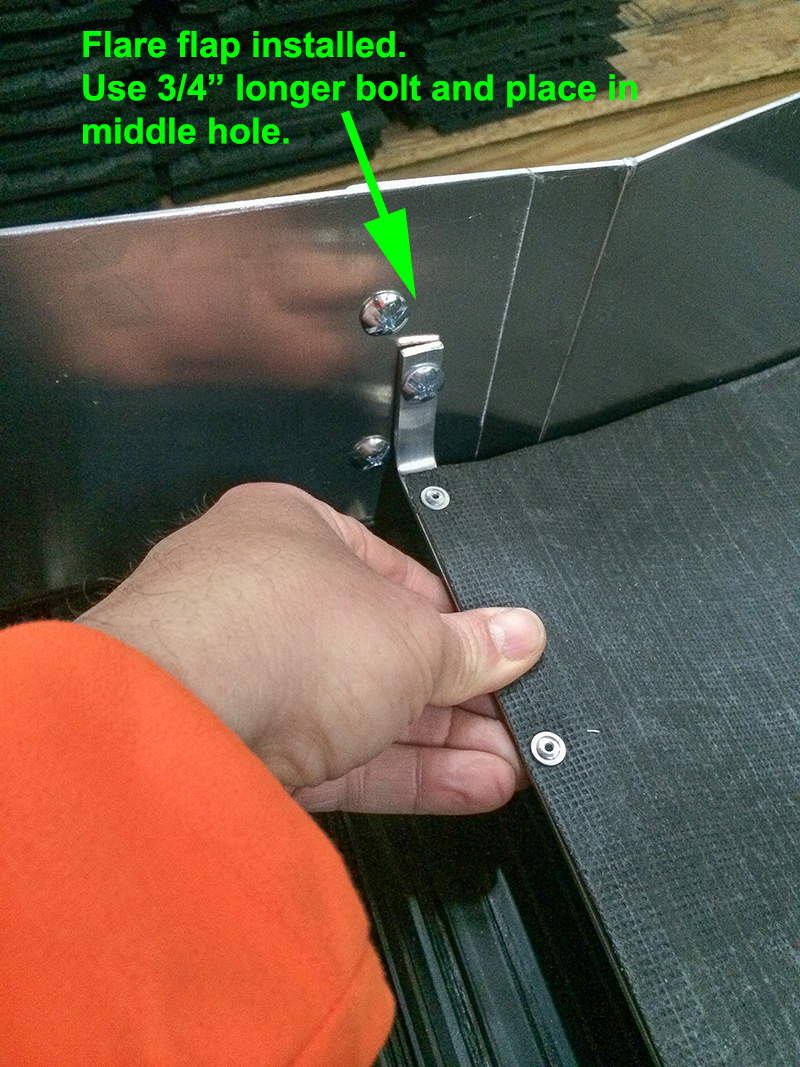
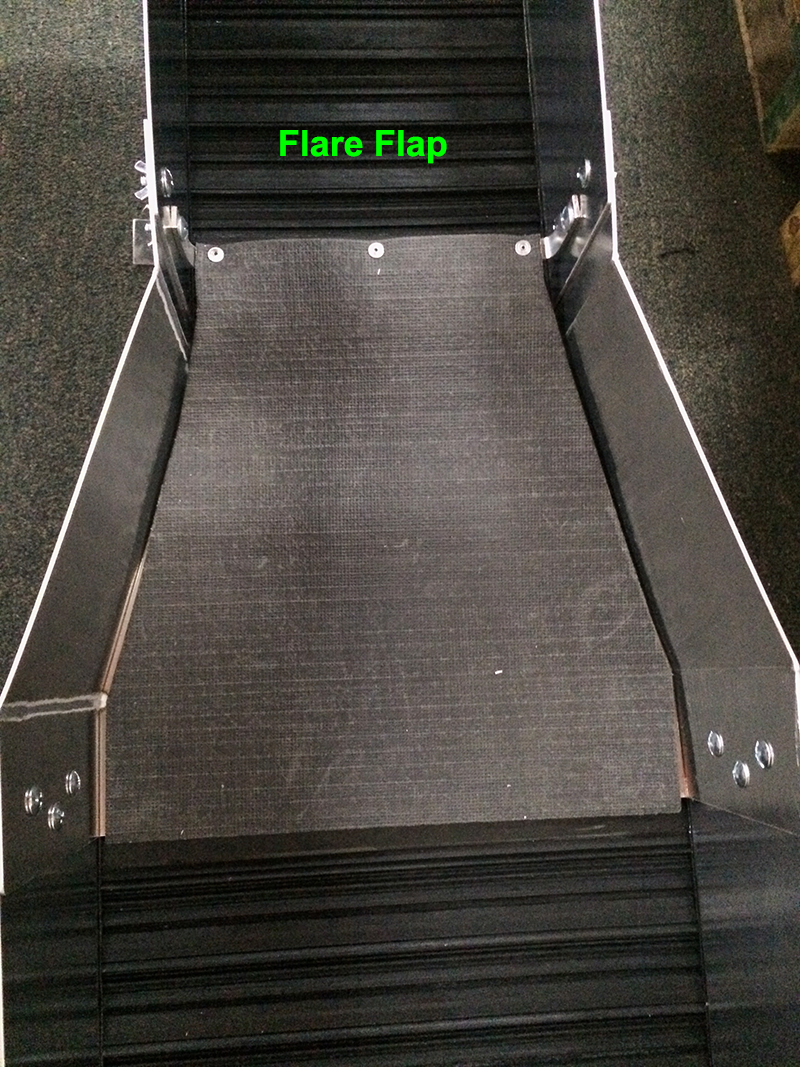
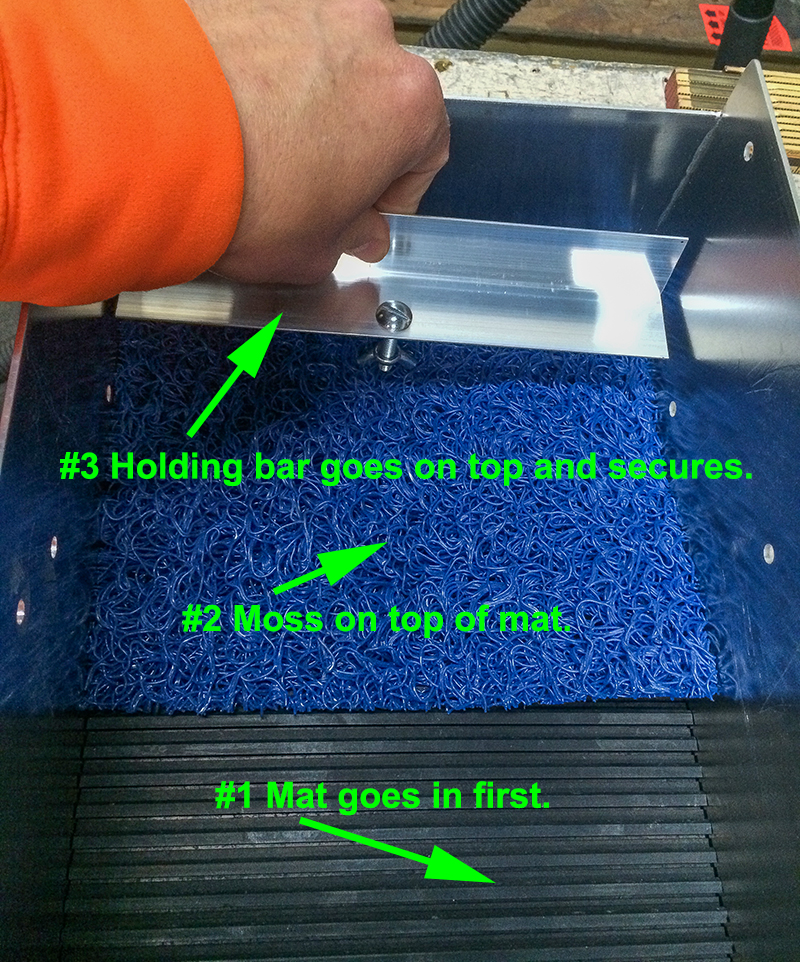
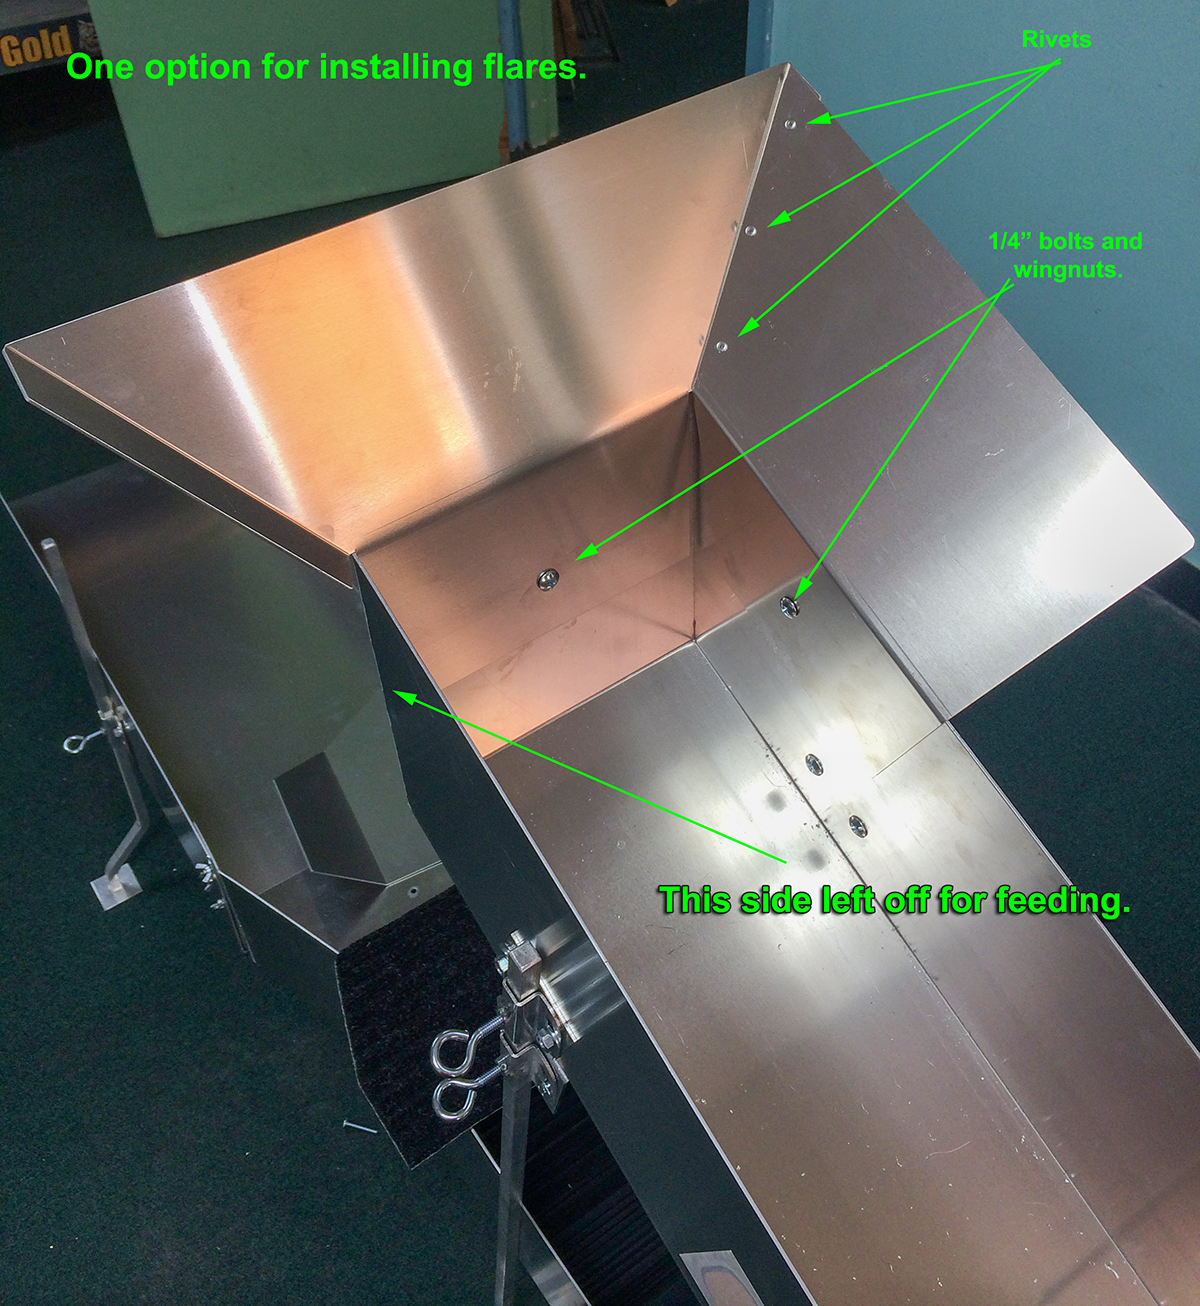
After much testing, Doc has decided to pull all the STOP BARS in the flare section. We switched to a heavier RUBBER matting vs. the carpet. Also, the stop bar throws settling gold back UP into the flow. Removing it keeps it settling. Some units will come with rivets in the flare. Later models will have no rivets of holes.
–
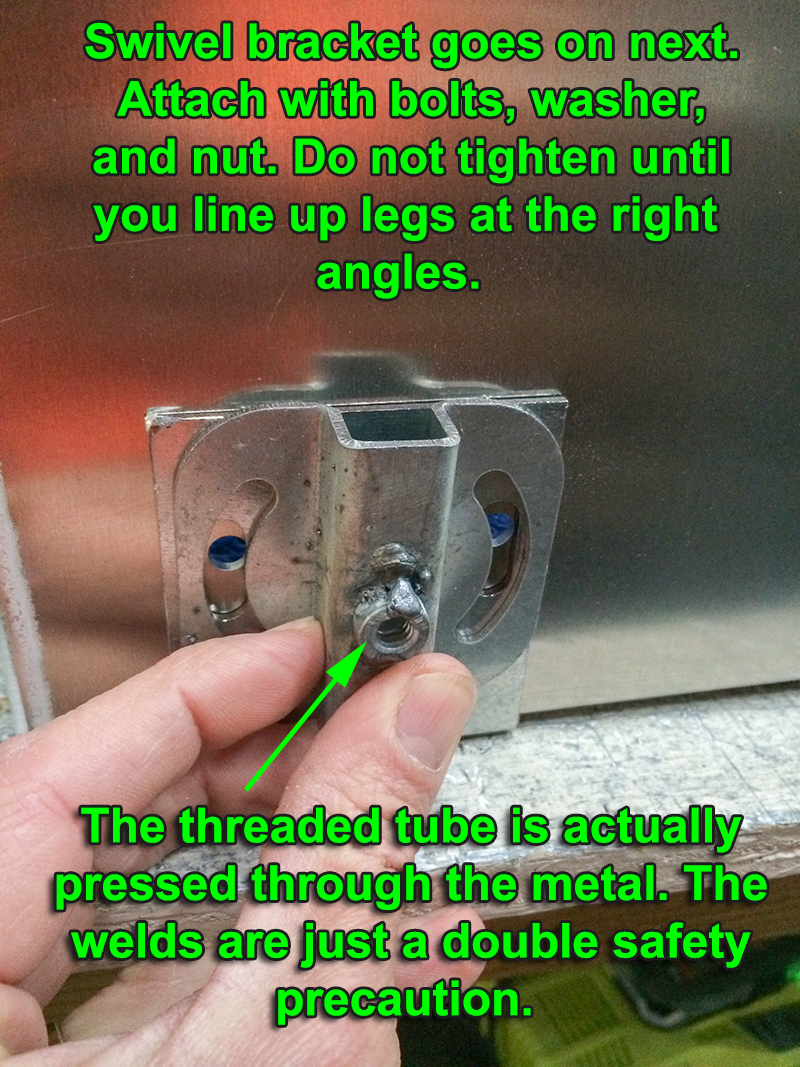
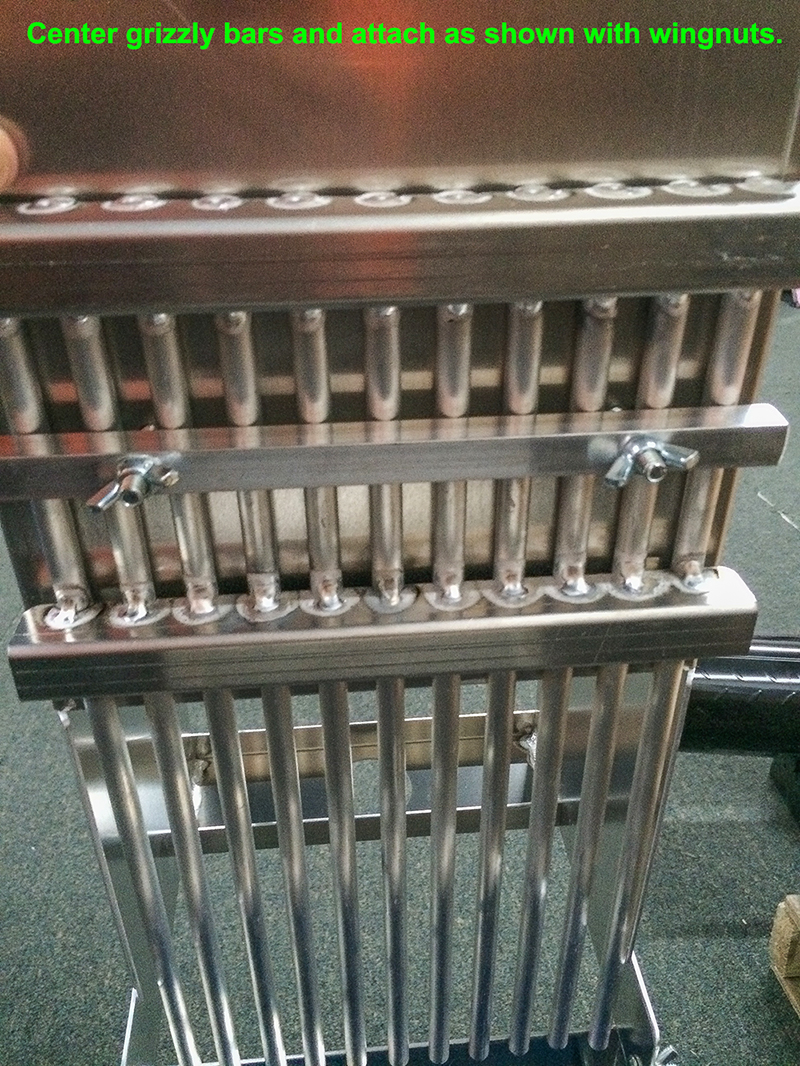
-Below is probably the only place you’ll want to use lock washers. We include them with many units but they often do more harm than good. Once you put them on, it’s often hard to loosen wingnuts. So at the header box is about all Doc uses them on.
–
–
–

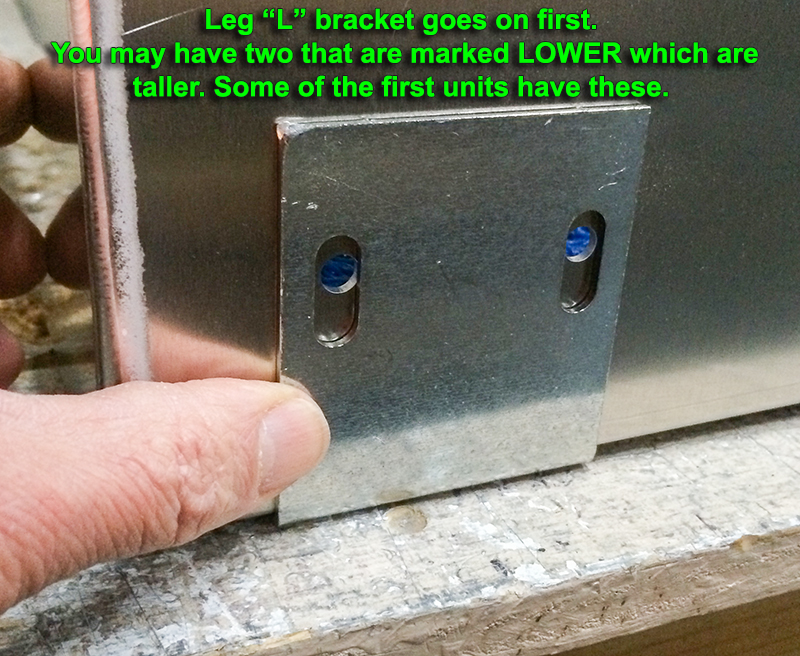
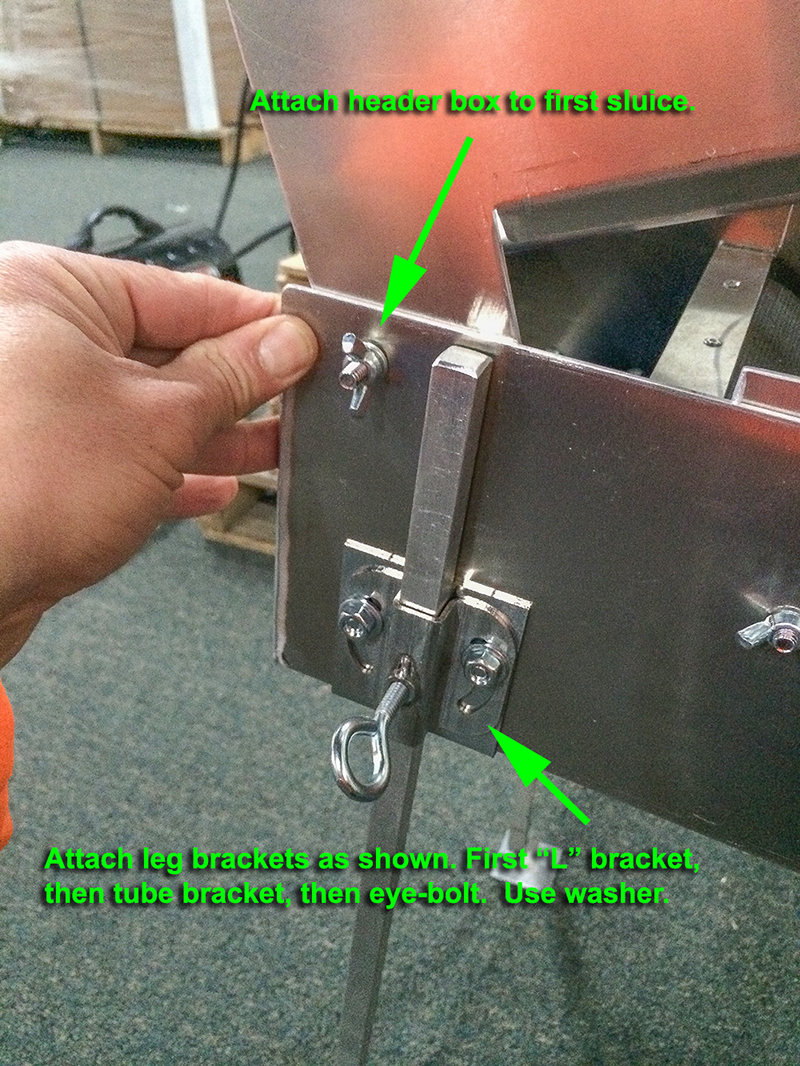
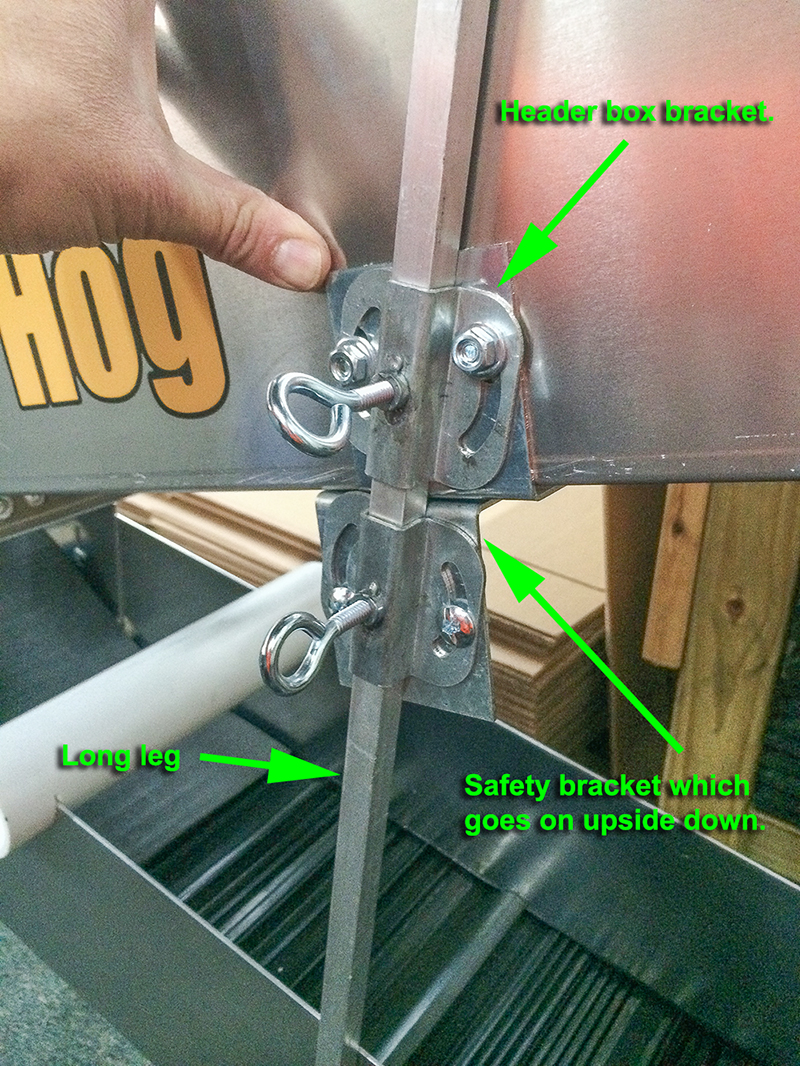
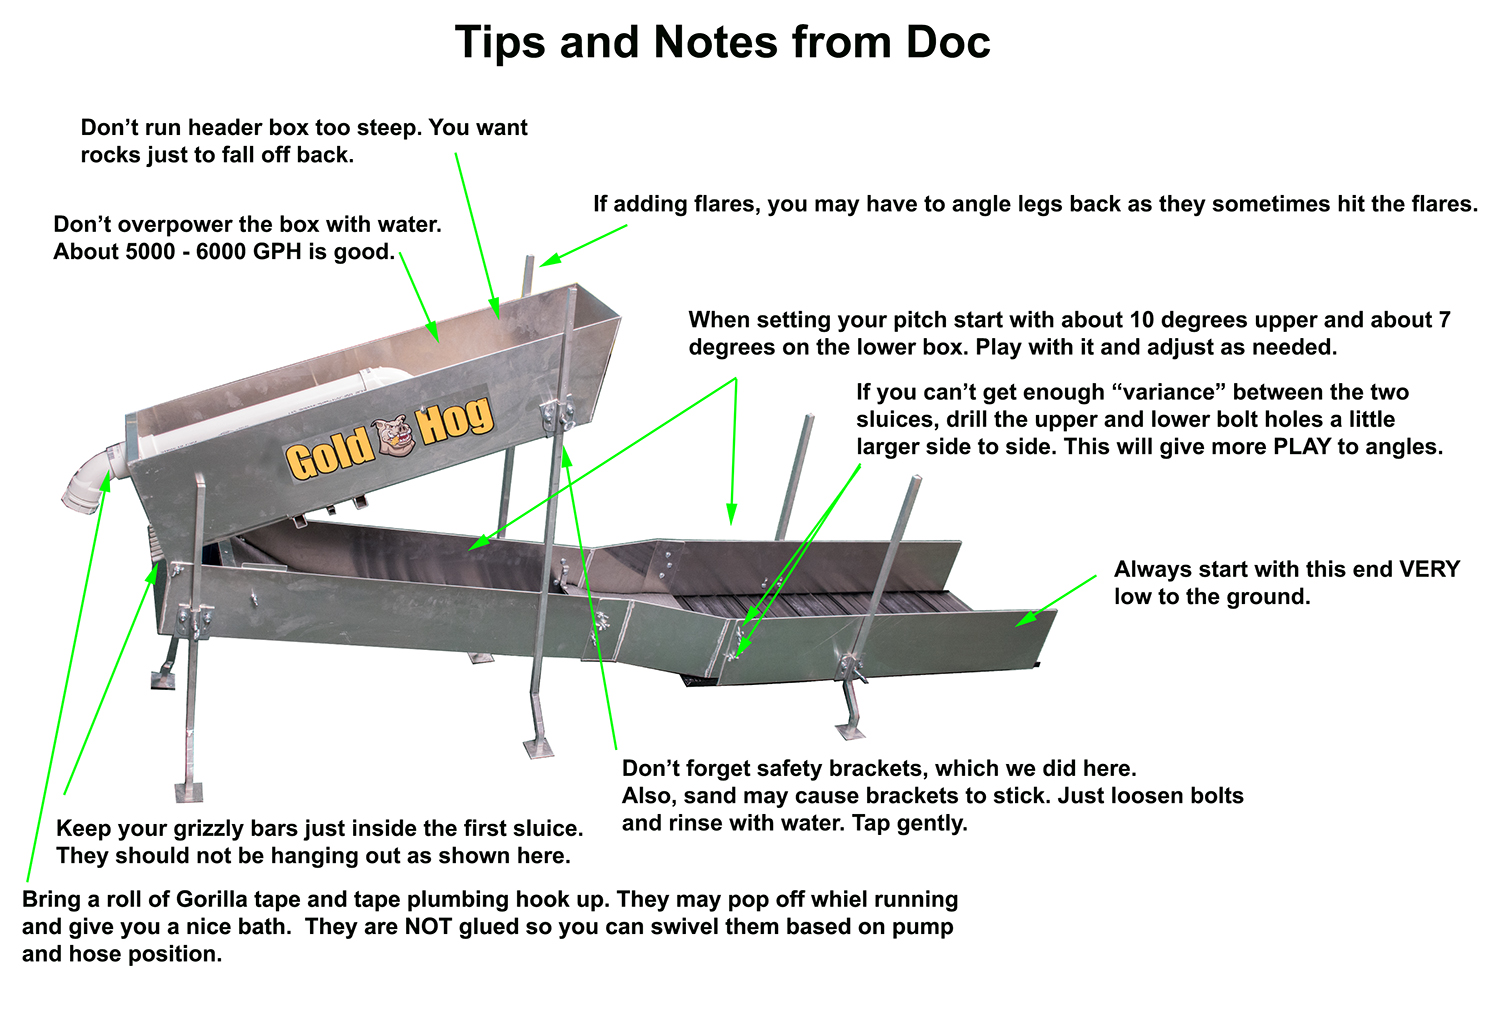
Long leg brackets / header box brackets:
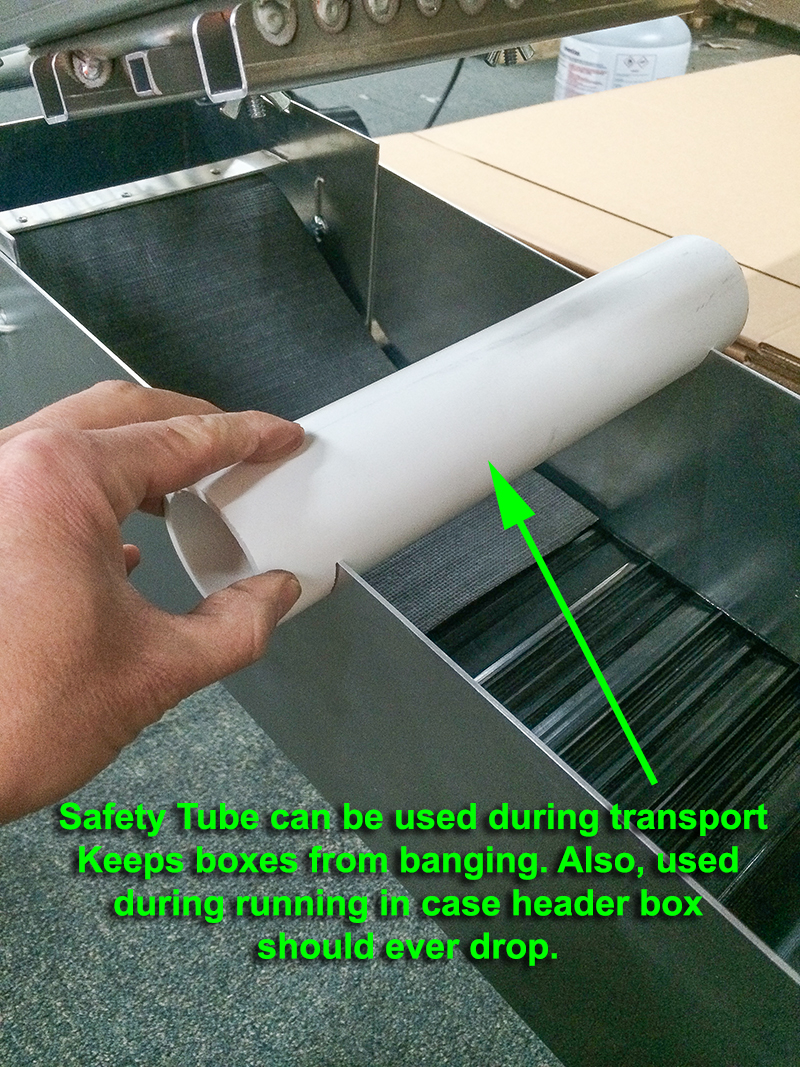
Always use you safety bracket. Don’t over tighten the nuts so you can swivel the leg position. Also sand and dirt likes to hide in them making them hard to move sometimes.
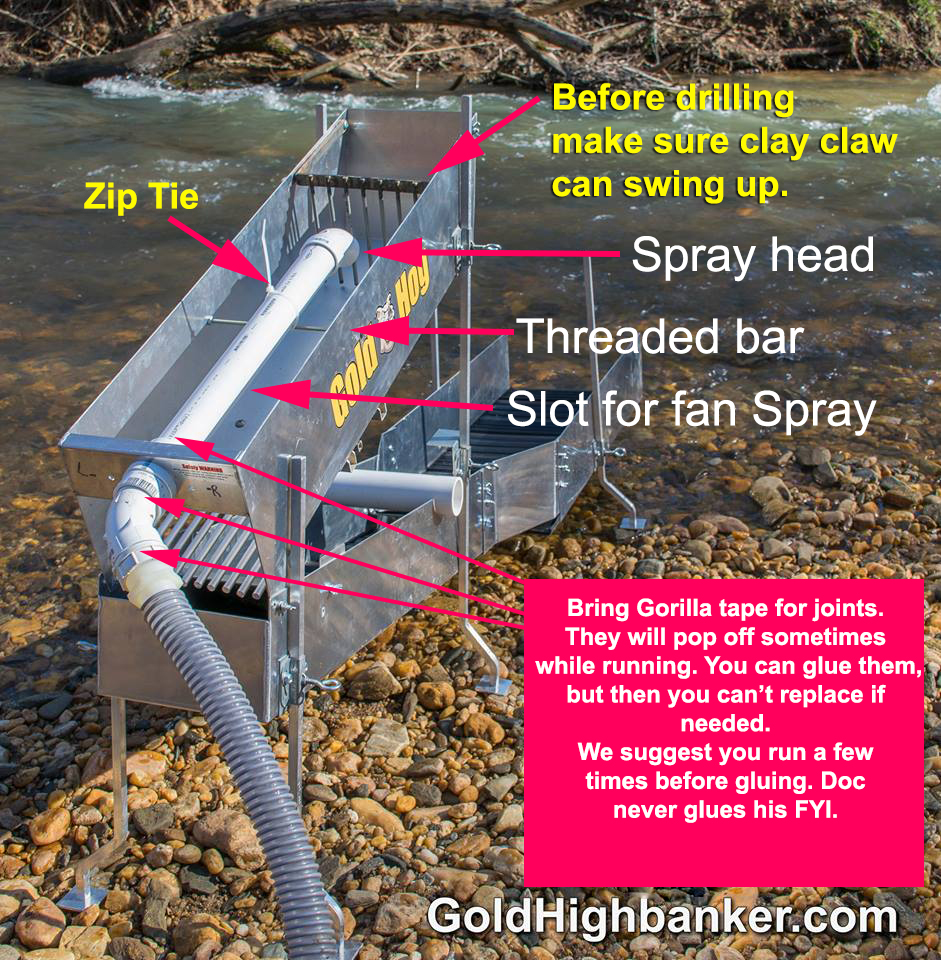
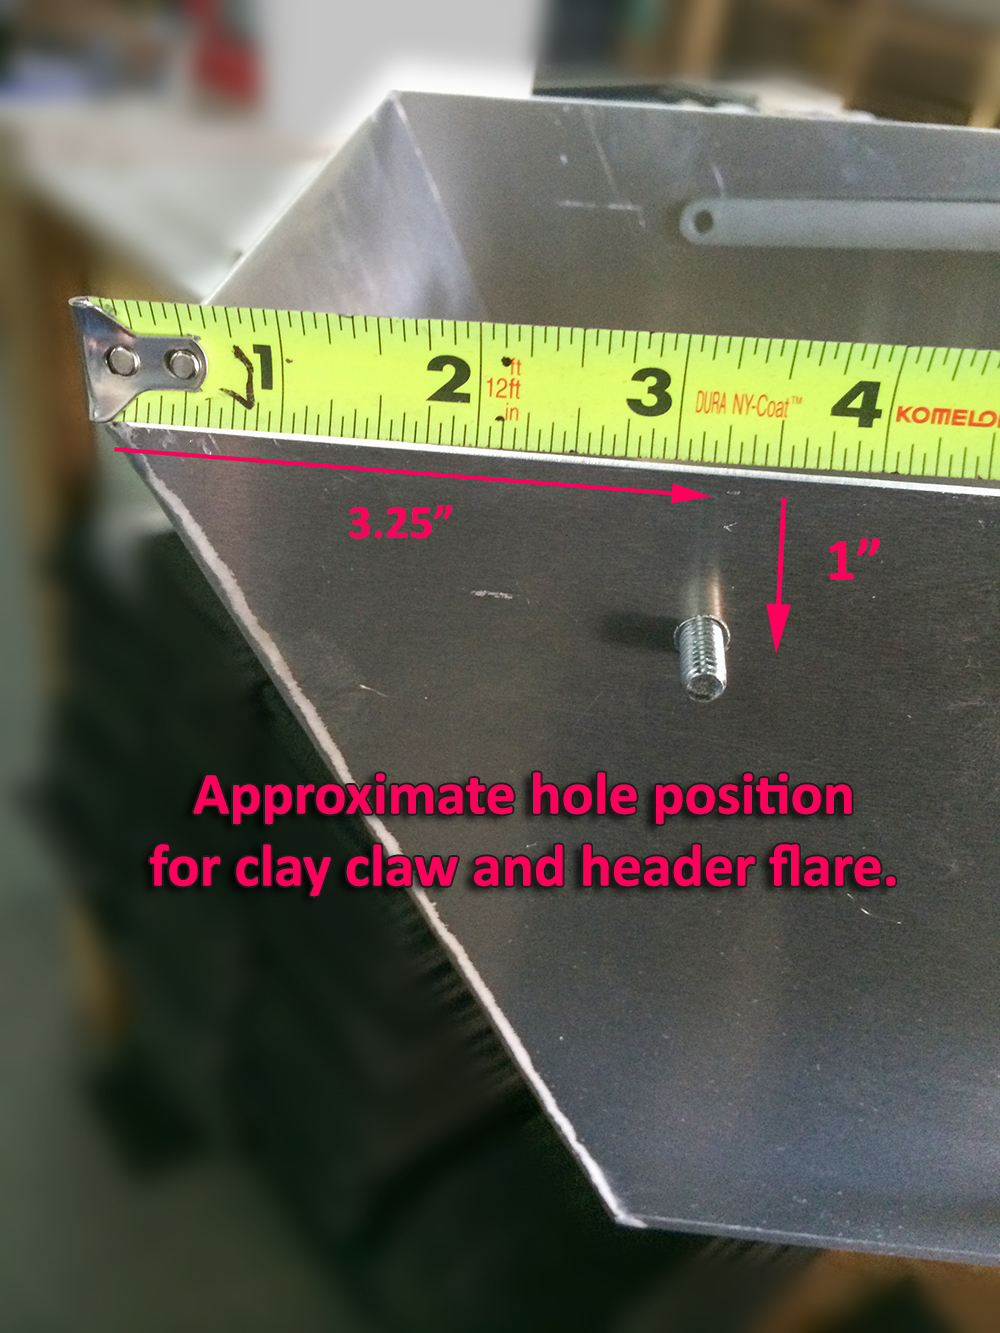
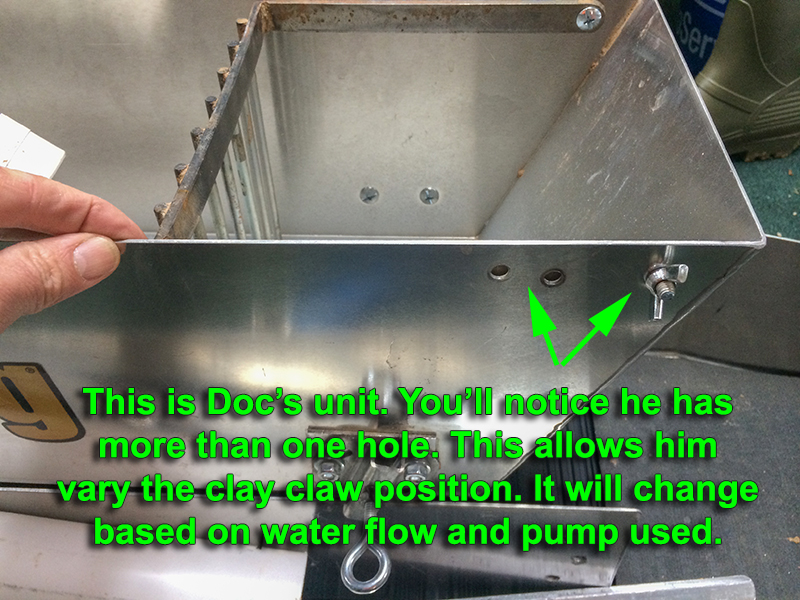
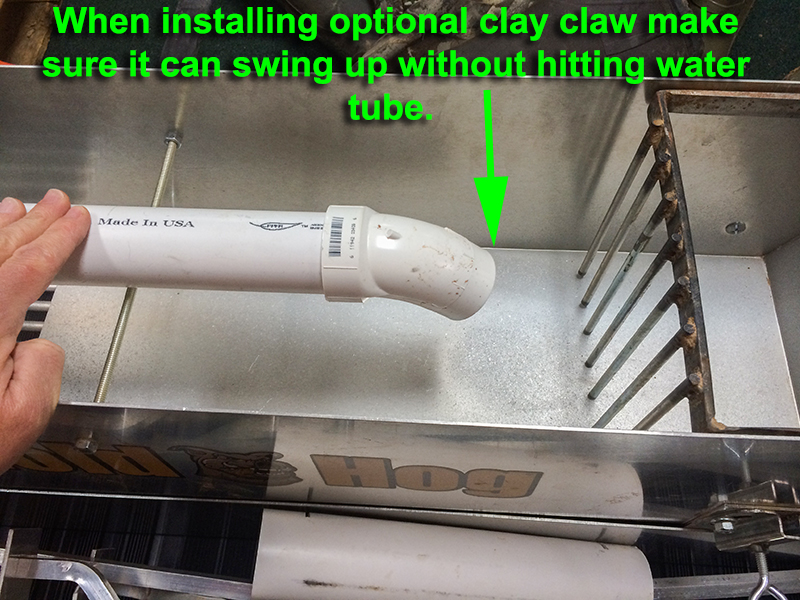
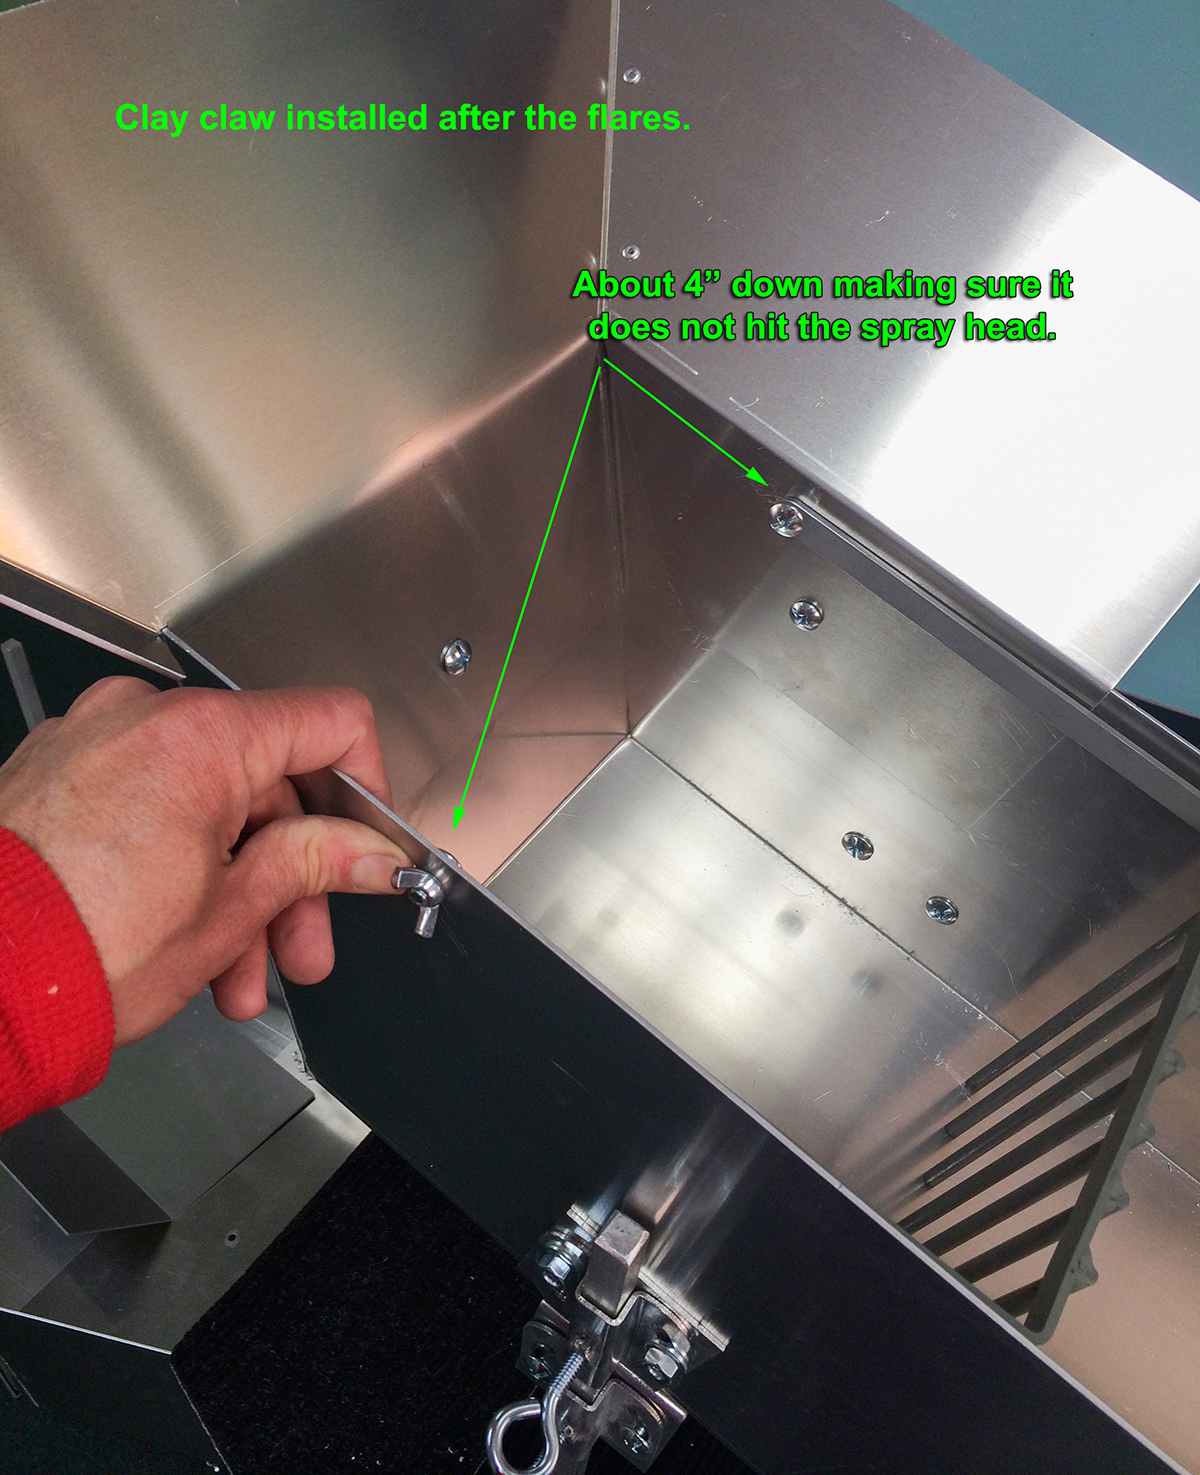
Clay Claw:
The is no “exact” placement for it. Doc likes to put two holes. One about an inch away from the end and the other about two inches away. Both are roughly 1″ down from the top so the claw stands “upright” or perpendicular to the tray.
Header Flares:
The header flares are the only “tough part”. We do not drill them as some may want to rivet them on, but others may want to use nuts and bolts. Using nuts and bolts allows you to remove them. Also most people only run with UPPER and ONE SIDE attached. This allows for MUCH easier feeding. If you put on all 3 sides, you’ll have to shovel / dump / feed OVER that side flare. Therefore leaving one side off is a good idea. However… which side should you leave off? That’s why we say do a dry run. It varies with every person. Right handed or left? Which way will you be feeding?
Next… the flares are pretty close to fitting perfect but there is always a small amount of play do to complex bending and angles. Match up the FLARES first…. connect them… then attach to the header box. This will help align them perfectly. Do not attach to the header box first.
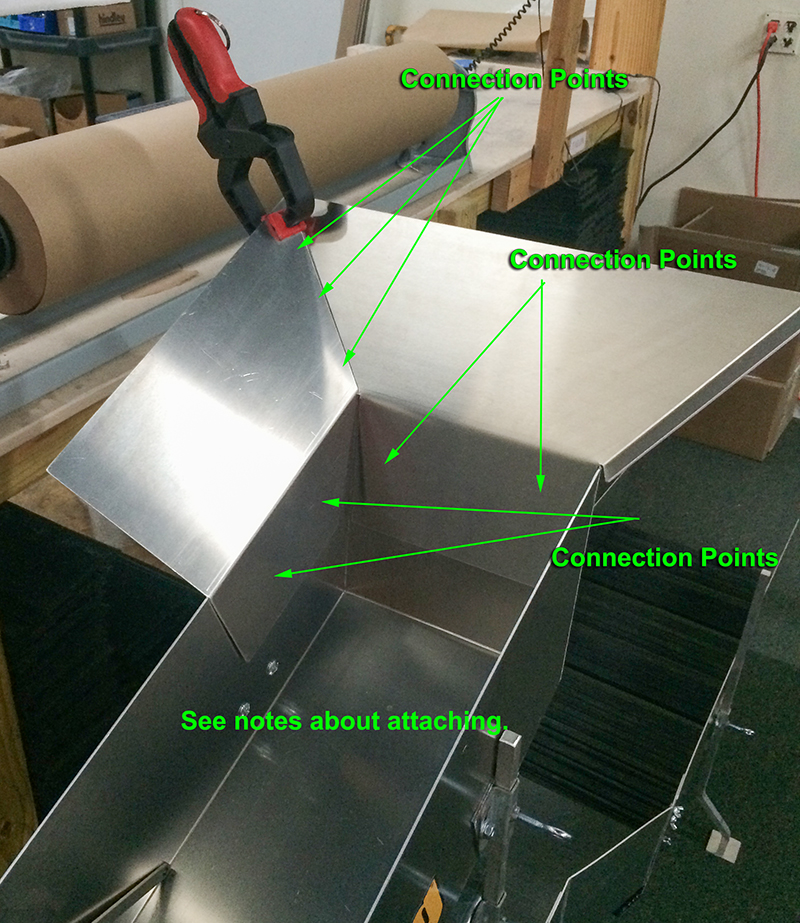
The image below can be clicked to see larger.
Video on install Flares and Clay claw.